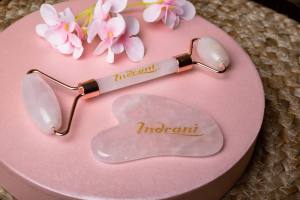
It’s strangely more difficult to figure out how to utilise jade rollers than it is to photograph them in a cute way.
If all you’ve seen of jade rollers and gua sha tools is a quick stroll through Instagram, you’d be forgiven for believing they’re just used as focal points for flat lays. The skin-care instruments made of jade, marble, and rose quartz aren’t new; their origins date back centuries.
However, for social media, the tactics I’m familiar with have evolved over time. When learning how to use a face roller, there are two things to keep in mind. It’s pointless to roll your face and anticipate drainage if you haven’t started with your neck. Before moving on to your face, roll your neck first to empty the lymph pathways. Second, she warns against exerting too much pressure. Use a light touch; the roller’s weight will take care of the rest.
We recommend starting with a clean, moisturised face and then layering on more product if desired; the massage will help push it deeper into your skin.
Gua Sha Tool: How To Use It:
PREPARE YOUR SKIN IN THE FIRST STEP
Take your favourite moisturiser, serum, or facial oil and apply it to your face. Apply on the front, back, and sides of your neck, as well as your face. This step is essential if you want your gua sha to glide over your skin without pulling it.
STEP 2 – YOUR NECK WILL BE THANKFUL FOR THIS.
Lightly sweep the v-shaped portion of the gua sha up your neck. Begin by placing it at the base of your collarbone on your throat. Glide up to your jawline.
SNATCH THAT JAW IN STEP 3
The v-shaped component of your gua sha tool should be placed at the bottom, middle of your chin. Sweep your gua sha up and out along the right side of your face’s jawline. Rep this motion 3–5 times on the right side of your face before repeating on the left.
CHEEKBONES ARE POPPING IN STEP 4
Place the gua sha tool’s long side against your cheek. Glide the gua sha up your cheekbone and out towards your hairline, starting from the centre of your face. Repeat this motion on both sides of your face 3–5 times.
STEP 5 – PAY ATTENTION TO YOUR UNDER-EYES
Run the top curved section of the gua sha beneath your eye, from the inner corner to the hairline, lightly. You should be particularly cautious here because your under skin is delicate and you don’t want to pull it. On each side of your face, repeat this step three times.
STEP 6 – REMEMBER YOUR FOREHEAD
Work your gua sha from your brow bone to your hairline using the long side of the gua sha. We normally apply this in three places on the forehead: left, middle, and right. This procedure should be repeated 3–5 times each section.
We hope you understood how to use the Gua Sha tool